NonDestructive Testing

S.I.ME. performs Fluorescent Magnetic Particles and Penetrant inspections, both Nadcap approved.
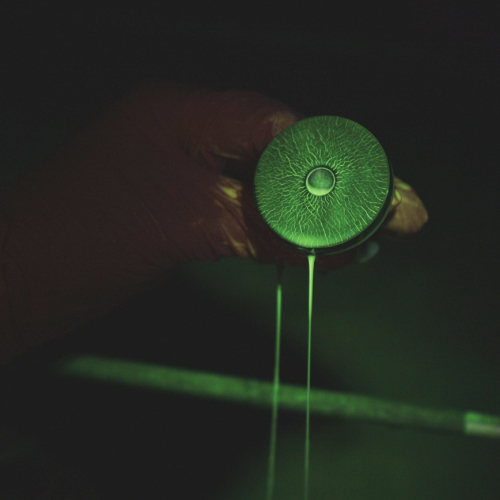
Magnetic Particle Survey

Penetrant Survey
The magnetic particle inspection or magnetic test is a non-destructive testing (NDT) method which allows detecting surface and sub-surface defects in ferromagnetic materials, without altering the geometric characteristics and the chemical-physical properties in any way. Only fluorescent particles (visible with ultraviolet light) are used.
Max inspectable length 1000 mm; Max diameter 150 mm.
Standard ASTM E 1444 and customers’ requirements.
Liquid Penetrant Testing can be applied to any not affected by excessive surface porosity and clean material, either metallic or non-metallic. The check is based on the principle that the liquid penetrant enters into the open surface discontinuity by capillary action; the excess penetrant is then removed; a developer (usually dry powder “form a”) is then applied to the surface of the part, to recall the penetrant from the discontinuities and produce a surface indication.
Max inspectable length 1000 mm; Max diameter 150 mm.
Standard ASTM E 1417 and customers’ requirements.
TYPE I Fluorescent Penetrants
METHOD A Water washable penetrants (No A(W))
METHOD C Solvent removable penetrants (For local check only)
METHOD D Hydrophilic post emulsifiable penetrants
LEVEL 2 Medium sensitiveness
LEVEL 3 High sensitiveness
Passivation
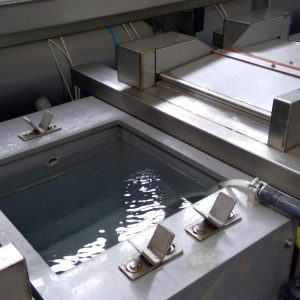
The passivation treatment is carried out to quickly restore the natural passive layer of stainless steels and in a controlled manner, eliminating, at the same time, any traces of surface contamination: this treatment, in fact, should be properly called “decontamination”.
Height 41 cm; width 44 cm; depth 50,5 cm
AMS 2700 and customers’ requirements.
Passivating solution may be of different types.
Passivation processes performed at S.I.ME. are:
AMS 2700 Method 1 – Type 2 (Passivation with nitric acid and sodium dichromate at medium temperature);
AMS 2700 Method 1 – Type 8 (Passivation at high concentration of nitric acid at medium temperature).
Heat Treatment
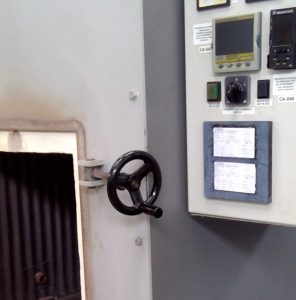
S.I.ME. carries out Heat Treatments of steels according to international and customers’ standards by employing a dedicated furnace.
Furthermore, S.I.ME. Heat Treatments are Nadcap approved since 2015.

Aging or Precipitation Hardening : Heat Treatment at an intermediate temperature such as to cause the precipitation hardening of the intermetallic composites formed during solubilization. This heat treatment leads to an increase of the mechanical characteristics of the material.
Stress relieving: Heat treatment at a temperature lower than the last tempering or aging, which reduces the residual stresses / stress state induced by the previous processing (eg grinding process).
SIME furnace is classified as follows:
Class 2: it defines a ±6°C uniformity (some design authority may require ±5°C).
SIME furnace reach an uniformity of ±5°C.
Instrumentation type B: a control sensor that controls and display the temperature in the work zone; the temperature indicated by the control sensor in the work zone shall be recorded by a recording instrument; a recording load sensor in the work zone; an over-temperature instrument in the control zone; no additional sensor used in SIME.
One work zone.
The qualified area of the furnace has a cubic shape and is defined by the size of the basket used for the production (Dim. 410 x 540 x 400 mm) of the volume of 0.088 m³, and by the plate on which it is arranged.
Atmosphere inside the furnace is air (Class C according to AMS 2759).
The qualified temperature range for the furnace used in S.I.ME. is 120°C ÷ 621°C.
Firstly, each HT is checked throught the furnace recording software, where the diagram with temperature data are made available to the operators. Temperature data shall be inside the required uniformity.
Secondly, a hardness test is carried out for each aging Heat Treatments.
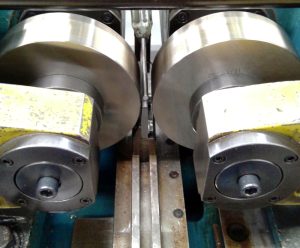
Thread Rolling
Precise, resistant and perfectly surface-finished threads.
The production of external threads takes place by plastic deformation of the material, with a rolling process between threaded dies.
Thread rolling differs from traditional methods of machining by removing chips with cutting tools, as the thread does not interrupt the continuity of the material, but determines a displacement of the material.
The effect of the process is an alteration of the structure of the metal where the fibers, without interruption, follow the geometry of the thread.
The advantages of the thread rolling process over the standard CNC machining are as follows:
Greater resistance of the thread to mechanical stresses, thanks to the continuity of the fibers of the material and the hardening resulting from plastic deformation
Greater resistance to wear, as the thread rolling process produces a smoothing of the flanks of the thread, with an improvement in the surface finish and a decrease in the coefficient of friction.
The machining is extended to all metallic materials, with:
– Maximum diameter: 50 mm
– Maximum rollable pitch for thread: 5 mm
These values are conditioned by the type of material and the length to be rolled.